
I make a lot of art to simply find out the nuances of a technique, and how to refine it. These pieces are generally made so that I can make mistakes, test theories, and not worry that I’ve made something completely crap.
When someone first develops an interest in the arts they quite often have unrealistically high expectations of themselves. Phrases like I can’t draw, or I can’t paint; or I would just like to learn exactly how to take the perfect photograph, are often heard in creative sessions.

We’ve grown up in an age immersed in art, images, and advertising. Taking in knowledge through osmosis, and forming opinions based upon the lensing or focussing effect of someone else’s understanding.
If we hold ourselves permanently in shadow of giants, in other words expect to paint like Van Gogh on the first go, or to photograph like Gregory Crewdson after one lesson. We will never ever be satisified.
Loosen up. Lighten up. Have fun, and for goodness sake- make something! Don’t fret if it goes wrong, it’s not the end of the world.
Any who, I digress.
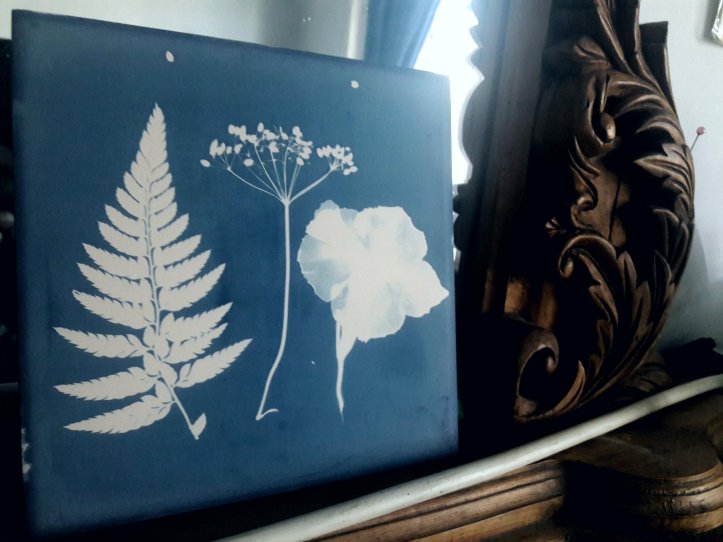
So, I made some test pieces of cyanotype printing on to bisque fired ceramic tiles. My first test was about fresh chemical application versus a 24 hour drying time.
The above tile was the freshly applied solution. I exposed a floral arrangement under a uv lamp for 45 minutes, and washed the tile for around 15 min in cold running water.


24 hours later I realised I hadn’t washed out the excess solution from the tile enough, as it was continuing to darken and was looking less contrasty. I washed the tile in running water for another 10 minutes, and left it to dry. I then used Japanese gold size to varnish the piece. This stops the reaction.
I love the depth of the blue that was achieved with this method, but I have noted to more thoroughly wash the tiles for a minimum of 30 min.


These other tiles I left the solution 24 hours to settle in to the surface. Using the same exposure time under the same uv lamps created a completely different blue! The chemical was prepared in the same batch as the first, so the only difference is the 24 hour drying time.
I also used a pinhole photograph from the Bridges pop up darkroom session, to turn into a digital negative so I could print it onto the tile. As you can see above; this worked fairly well. Again, I waited around 24 hours to see if the tiles would go the same rich Prussian blue of that seen in the first test. They did darken, but not to the same intensity.
My next batch I will prepare fresh then expose and wash, on the same day to attempt to get a certain uniformity of the blue from piece to piece to more easily display them together.
More technical tests to come.
Catch up on my WearExperimenting project by visiting the website:
http://wearexperimenting.co.uk
I have 3 photographic challenges that you can do from home. Go to online experiments to find out more.
Congratulations on your works of art and for the experiments. I am carrying out tests with my daughter using the Rayher 34410102 Raysin 200 preparation to create different objects with silicone molds. I have already made blueprints on paper and now I am experimenting with this synthetic ceramic. I found the darkening of the image caused by washing too short. I’m working on it. I use a dilute solution of hydrogen peroxide to speed up the oxidation process of the beautiful dark blue. Have you done similar tests?Best regards from Italy
I think a very cold wash for a long time should work, depending on how porous the polymer clay is. I tried some but the cyanotype solution didn’t adhere to it, however adding gelatin might work the same way it bonds to glass- suction! Thank you for reading. Good luck in your experiments! 🙂